


Setting up your DEVIreg Touch Thermostat
January 25, 2017 Katie
After allowing the thermostat to fully charge the battery for 15 hours - Follow these easy set-up steps
Confirm the language of your choice using the arrows to scroll up or down and confirm by pressing the  (top, right-hand corner)
Setting Date & Time - This is done automatically before the set up wizard - simply hover over the hour then press on the number you wish to adjust, then use the left and right arrows to adjust confirming by pressing the (top, right-hand corner) then repeat for the minutes. Hover over the day/month/year to change each one confirming by pressing the (top, right-hand corner).
Installation - Setup Wizard or Enter Code
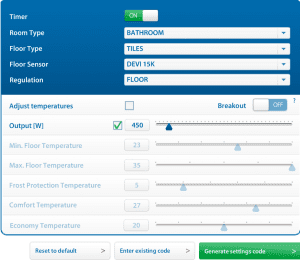
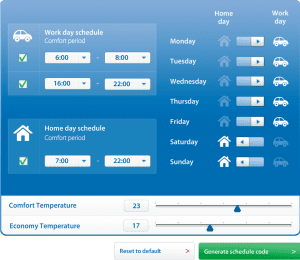
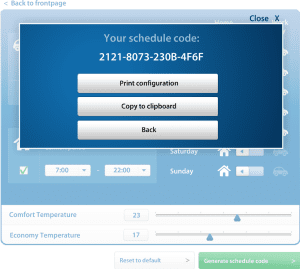
Optional Code Generator - This allows the set-up in single or multiple installations for either a schedule or settings . Once you have your code click on Enter Code and simply enter your code accordingly.
DEVIreg Touch Setup Wizard
1. Select Setup Wizard and confirm walk through the following steps by pressing the (top, right-hand corner).

2. Control - Using the left and right arrows, scroll to select Floor or Room and Floor according to your specifications - pressing the (top, right-hand corner) to confirm

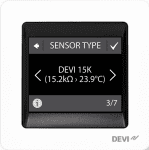
3. Sensor – Using the left and right arrows, scroll to select Devi 15k, or select the appropriate imbedded sensor to be re-used - press the (top, right-hand corner) to confirm.
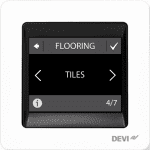
4. Floor - Using the left and right arrows scroll to select your floor coverings option choosing from Tiles, Hardwood, Laminate or Carpet - press the (top, right-hand corner) to confirm.
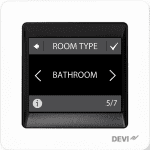
5. Room Type – Using the left and right arrows, scroll to select your room type, choosing from Bathroom, Kitchen, Living room, or Bedroom, pressing the (top, right-hand corner) to confirm.
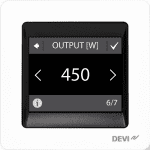
6. Output – Please refer to installation schedule/packing slip provided. Please also note that the wattage selected does not have any bearing on how controller works. It is simply to follow your usage please refer to Settings, Info, usage) Using the left and right arrows, scroll to select pressing the (top, right-hand corner) to confirm.
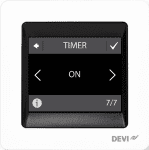
7. Timer - Select timer On to optimise energy savings. you can adjust time periods later using the menu button - confirm by pressing the (top, right-hand corner).
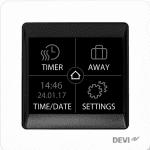
Main Menu
Stand-by - The resting state of the thermostat will simply have the temperature with a circular image in the bottom left corner. To access the main menu press the circular image.
Timer – Select 'On' if you wish to use programmed times, off if you wish to run controller in manual mode - pressing the (top, right-hand corner) to confirm and complete your installation.
Setting the Temperature - These setting can be found in Timer -Temperatures, where you can select comfort and economic temperatures
The DEVIreg Touch will be automatically updated with the corresponding factory pre-set comfort temperature and economic once the floor covering and room type has been selected. If your floor falls below this temperature your heating will turn on outside of your programmed periods and heat up to this temperature.
We recommend that you turn the economic temperature down to 5 degrees to ensure your floor heating does not come on outside of your programmed periods.
Turning the thermostat controller ON and OFF: To turn your controller OFF at the end of the season, simply feel along the outside of the right side of the screen. Towards the top you will feel a slight indent where the button is. Press in the button and four menu options will appear. Select Power OFF which is the last option on the screen. To turn the controller ON simply touch the screen once for the ‘ON’ symbol to appear then touch the screen a second time to reactive the setting that were previously used.
Turning off the lock feature - Along the right side of the screen towards the top, you will feel a slight indent where the button is pressed in and ‘SAFETY LOCK ENABLED, LOCK’ will appear. Confirm by pressing the , then press Menu - Settings - Options- Safety lock tap off, and then press the to disable the safety lock.
To adjust any original settings you can select menu- Settings- Installation and choose from Setup Wizard, Manual Setup or Enter a code which will instal pre-set settings.
To see the details of your setup - Press Menu - Settings - Info - About and then scroll down to see the easy-to-use thermostat blueprint. This can help with any troubleshooting and makes it easy to detect any first hand problems.
Please click on the virtual thermostat to try it out now!

")

